
Full Transcript
00:00
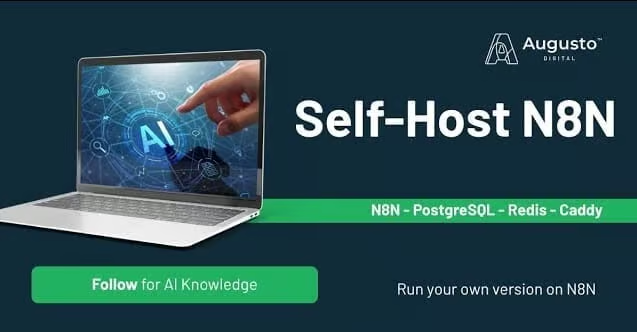
Hello everybody, this is Jim. Today we’re going to talk through self-hosting N8N on a Docker with Postgres SQL. You can see that here that I’ve got a combination of things we’ll be installing, N8N, Postgres SQL, Docker, and Redis. To do this,
00:16
I’m going to walk from the very beginning. I’ll probably do a few more videos after this of once you have self-hosted N8N, the things that you can do. So, for this video, though, we’re going to start with these tools. I will configure an AWS EC2, so a virtual machine in the cloud, to run Docker.
00:34
I will set up N8N with Postgres SQL, and then I’m going to configure a custom domain with an SSL using a tool on Docker called Caddy, and then we’ll show you how to use DNS to connect to that domain. At the end of this video, you’ll have a tutorial on how to use AWS and spin up a N8N
00:53
server that you can use with your organization that will be secured by SSL. Now, my, only comment here is please take the normal precautions that you do to secure your EC2 environment. I’m just going to go through this quickly. I won’t be walking through all
01:07
the steps we typically do, because at the end, I’m going to tear down this on this, environment. So to begin, let me quickly run directly to Amazon. I’m going to launch a new EC2 instance. we will call this the N8N demo. And we’ll just put version three here for,
01:26
for doing it. I am going to pick Ubuntu server 24.4 LTS. And I’ll be using a T3 micro. And you can see here really quick, that’s free tier eligible. If you want something more powerful to run more workloads, I suggest kind of moving up the T3 family.
01:45
you know, you can obviously pick something like a T3 small that’s got two CPUs and two gigs of memory, or even move up to a medium. But for now, we’re going to do the demo with this. I already have a key. Pair that I’m going to take advantage of. If you’re new to EDS or EC2 or Amazon,
02:01
create a new key pair, or you can use one of your existing ones. And then the only setting I’m going to make sure I do here is make sure that I allow HTTPS, because we’ll be using, Natan over that protocol, protocol and HTTP. And we don’t, we’re going to need more than eight gigs here to get
02:18
things running. So I’m going to go ahead. And set 30, which allows us to stay in that free tier range. with that said, let’s spin up a EC2 instance. but when this is done, I’ll just commit quickly, commit, or I connect to it through the command line here.
02:34
And you can see it’s running and I have an IP address. One thing I’m going to state, if you’re following along and you want to quickly get it up and running, I would take your IP address here and go into your DNS and already configure a name.
02:50
I’ll show you this later, but I’m going to do this behind the scenes really quick just to keep everybody in line. Really. I’m going to be in my DNS record. I’m happy to be using CloudFlare. I’m going to go ahead and use this domain called, Augusto, Agosto, where’d it go? Augusto. AgostoDemoSite.
03:05
So I’ll create a record called N8NDemo, we’ll call it three, and I’ll put the IP address of my newly, created EC2 and I’ll hit save. So now the domain name N8NDemo3 at AgostoDemoSite will point to that server. So let’s go back to my server. it should be up and running. Let me just hit refresh.
03:30
I’m going to connect to it. To make this easier for viewing, I’ll just connect straight through the browser using the, the connect terminal command here. And once this is done, we should see my server. There we go. Alright, here we are for the first time on our new machine.
03:52
I’m going to walk through installing Docker, but first let’s look who the user is. Who am I? You can see the user is Ubuntu. That’s fantastic. I have some instructions that I typically follow. I did this actually for this video, to see the steps that you walk through.
04:06
And I’ll include this in my repo. First thing is you want to update your system packages. So if you’re not familiar with Ubuntu, I’m running app update. That’ll go ahead and grab the most current packages. Next I’ll be running a app upgrade,
04:21
which takes these new packages that’s found and installs them. I’ll go ahead and I’ll run the upgrade. The second step here is we need to install the necessary packages to actually work with HTTPS and the common tools for us to debug. So I will run these once this command is complete.
04:45
All right, the upgrade is now done. Now we’ll be running again some necessary libraries and packages needed for this. the transport levels will be curl, which lets me, connect by a browser on the command line. Once that’s done, we’ll be adding the,
04:59
GPG keys. So we’re actually getting the most current and up to date, version of Docker. And then lastly, this command right here will allow us get the repo for us to pull down the most current version of Docker. Docker for the Ubuntu OS.
05:18
Next, next step after this is done is we will install Docker with the command sudo apt install docker community edition. This might take a moment. It’s about 400 megs. All right. Docker’s installed. Let’s go view if it’s running. So here we using the command system CTL,
05:40
I can check the status. You can see Docker is running. So I have Docker installed. I can look at the version and you can see I’ve got version 28.1.1. And then the last thing I’m going to do is add my user to the Docker group. So it allows me to run the Docker command without being
05:58
in pseudo. I need to exit this prompt and I’ll come back into it really quick. Alright, I’m back and I increased the font size. Once you have Docker installed, you’ll get used to running some Docker commands. In this particular case, I’m just going to make sure there’s no images running.
06:13
So we’re going to do docker ps, which shows any running Docker that might be out there. So at this point, I have Docker running up on a machine in the cloud. We’ll next go ahead and install n8n. Let’s go back over here really quick. Let’s take a look at what we’re
06:31
going to install. We’ll be installing a package we’ve created for our team that’s got n8n, Postgres, Redis, and Caddy. And this can be run locally on your machine that’s in your environment. or production-wise in the cloud. So we’ll be running through this. The first thing we have to really do
06:48
is clone this repo. So let’s go back to our instance. I’ll go ahead and show you my setup. I’m going to make a directory called docker. Then I’m going to go into that directory. And once I’m in here, the only thing in there is that docker folder. Whoops. Now I’m in the
07:05
docker folder. I’m going to go clone. So we’re going to run the clone command from git. It’s pretty straightforward. You just run git clone, and then you paste in the URL of the git repo you’re doing. And so in this case, I pulled down this n8n docker postgres. you can change directory into that.
07:26
And then here are all the files that we’re going to need to use. So let’s walk through the steps. All right. I’m going to open up that repo so we can see it again. It’s github, I’ll have this in the video files. We’re going to have these side by
07:38
side so you can see the commands. We’ve already downloaded that repo. We cloned it. The next step we need to do is copy the example env file into the our own. The env file is where you’re going to store credentials and other information that’s sensitive. So let’s go ahead and do,
07:55
let’s go take a look at that. All right. So right now I have the file and you can see it’s a It’s got a user for Postgres. It’s got a password. Let’s go ahead and make that, you know, slightly more secure. And again, I will be, getting rid of this when I’m done.
08:12
And then it’s using Redis. You can actually have a password set or not. we have this encryption key we need to generate. I’m going to go ahead and do this with the command, but before we close this file and save it, if you’re in a different time zone, change your time zone,
08:25
and then the protocol by default when we’re not running it in caddy is HTTP, which is fine because you don’t have certificates on your local machine. So for these next three items here, whoops, I should have kept that on that one. We’re going to go ahead and enter in the values that we need.
08:42
So let’s walk what these are. the host name of your server. If you remember, I went and made a DNS entry, go ahead and take a look at that really quick. That entry was for n8ndemo3, and that was at Augusto demo site. So let’s go right back to our example,
09:05
and I’m going to replace everything that’s in here with our actual. Name, so it’s n8ndemo at augustodemo.site, and I’m just going to double check the domain, I believe, augustodemo.site. There we go. I’ve got the DNS name correctly set. you’ll need to put an email address in here.
09:27
This email address is actually used for Let’s Encrypt, so I’ll just use one that we have So we’ll do cloud at augustodemo.site. All right, and then production said true. So let’s go ahead and hit enter, and I saved it. Let me go clean this up. With that change,
09:50
the next thing I’m going to do is go back to the, the github repo. There’s a command that will actually generate the encryption key. I’m just going to run this. And I’ll go again. Let’s take a look at the env file. Let’s give ourselves some more space here. There we go.
10:10
Now there’s an encryption key here at the bottom that was generated, I’ll go ahead and comment out this other line. See you So we are now set. All right. We have installed everything we need to run 8n. So the next command will be to turn on and run our docker compose.
10:32
my doctor composed that we put together is going to use Postgres as the database, and it’s going to inject in the Env files that we placed in here. It’s going to have its own location of a value that will back that up later. It’s got a few other items like a health
10:48
check to make sure it’s running. In addition, we have Redis, right? The Redis data is configured here. And then lastly, we’re going to scroll down and take a look at our N8n setting. What’s the image we’re pulling, the ports it’s running on, and then all the environments we need for it
11:02
to run. In addition to that, it’s taking our encryption key. And lastly, because we’re going to override it with our host name, it’s going to know to run on that DNS entry I created, which was N8n. lastly, I missed this, is caddy. Caddy is set up to read this file called the caddy file,
11:18
and it’ll generate everything we need. we’re going to run the command. Command called docker compose. We’re going to use the profile of production and up. The dash D will make it run. It’s a diamond, and let it continue to run. It’s pulling down the images We have
11:36
a Postgres image it’s pulling a Redis image. And edit an image in caddy. Right now it’s pulling down those docker images. The next step will be to extract them, and then it’s going to start docker. that finished. So it pulled all the images. It spun up the Postgres. Network volumes in the containers.
11:58
So the way you can validate it’s running is you can do docker PS. And it lists that I have each of these running. This image right here for it’s the container ID caddy. It’s been up for three minutes. Now, before I go any further, we can actually test to see if our
12:21
and it ended running. I’m in a terminal, but it’s really great to see we can run curl. So let’s do this. So let’s do curl local. I don’t need to S on this one. I’ll put the port of that in there. And really quick, it says that what’s right. I mean, you can tell it came back with
12:41
everything. It says, we’re sorry, but Nate, Nate, Nate, and cannot run without that. So Natan is answering and running. I do want to share really quick how you stop a docker from a command. Landline window. So the command we ran was doctor composed profile production,
12:55
and then up. If you want to stop everything, you just can do a down command. So same command, putting down in there and what it’s going to do here, it’s going to stop each doctor container. It’s going to remove any networks in the event that you need to upgrade trade. Nathan or any other image,
13:12
you would do the very similar command, but you call pull this would pull the most recent images. since we’ve just launched this it did not need it looked and compared that there wasn’t a new Postgres image or a new Nathan image out there. I’m going to go ahead and turn on docker again.
13:28
Let’s get everything up and running. And when this is done, we should have it. Okay. Fresh and eight and running. We’re going to check. I’m going to show you how to check logs, and then we’re going to go and open up the website. So let’s
13:43
make sure everything is running. I always like to look at the docker PS, and now we’re going to take a look at logs. This next command is in the repo as well, I’d like to share it because it’s a great way if you ever run into trouble. You can run
13:59
the command docker compose the command logs and then tell it which one of the doctors running you want to look at in this case caddy. So when we run this, you can see that this is all the long messages that are happening on caddy right now.
14:14
It actually looks like it generated the SSL certificate for what we needed. I don’t see any errors there. That’s great. Let’s quit this. I’ll do a control C. We can do the same thing with any then let’s look at the logs of any then it looks like,
14:29
and it is running and it says the editor is now accessible at our domain. That’s even better. So it took our custom domain. All right. With that said, let’s go back. If you haven’t done this already, you want to go into your domain registrar
14:44
or your DNS owner. You want to make whatever name you put in there. In my case, it was any then demo three, and then it put the IP address that it’s pointed to. There we go. You now have a fresh self-hosted and a debt set up. Now I’ll do a really quick.
15:01
Run in of Nate. And if you’ve never set up and what it looks like, and then I’ll leave this video. If you have any questions, throw it out there, but I’m going to create a user. I’ll hit next and then we’ll move on just so you guys can see. And I put my information in. It’s going to ask you a
15:16
few questions. I’m actually just going to quick run through these. There we go. Get started. I’m going to skip through. For now, I do recommend signing up if you want to use some of the great features like history for self hosted, but you can see really quick. If you’ve never used Nate and there’s a
15:34
dashboard here, you can create credentials workflows or view executions. You can test a simple AI agent for this particular demo. I’ll just make a quick workflow. Just to show you. a fun one. I’m going to do a quick chat, bot here on this machine. We just a simple flow. I’m going to add an AI agent.
15:60
And when I do an agent here, I’m going to set a system message saying, you are a helpful assistant that will help you. Answer questions with a technical background with the technical spin to the information. And again, I’m just demonstrating the value of a chat bot.
16:22
I’m going to go ahead and add open AI. And since we’re self hosting, by the way, if your machine has a GPU, you can go ahead and install Olama. I highly recommend it. And that I’ll be walking through another demo of how to do that. But for now, I’m just going to use open AI chat.
16:38
I’m going to create a credential. So anytime you do something to that, you need to create a credential. I’m going to do that here offline. All right. I’ve added my credential and I’m just going to call this an AI demo. I’d like to name each credential.
16:51
It looks like it worked just fine. And for this demo, we’ll be using. Let’s do something fun. Let’s use GPT. We’ll use four. That’ll work for now. All right. And for memory, if you want your chat to have some memory right now, I use simple memory, but since we already installed Redis,
17:15
we could take advantage of that as well. All right. I’m going to hit save and let’s go ahead and run our chat bot. Let’s see how good we did. Let me, resize this window so everybody can see. So again, in Natan, I’ve got a little chat window over here. Let’s say, why is the Sky blue.
17:34
So you can watch the agent run. It’s set a time. To memory agents running, it’s hitting our open AI chat model. And it came back with the amazing answer. It says the color blue due to the phenomenon known as the Rayleigh scattering.
17:48
So I gave a pretty good answer. what’s interesting if you’ve not used Natan and now that you have itself hosted, you can take some experiments and to do, it comes back, it stores your question. Why is the sky blue? I blew in memory. It then shows what it
18:01
did on the chat. Well, what’s interesting is you can see the number of tokens that used and how long it took, right? A more in-depth question or a more detailed question might take longer and take more, tokens. So here’s a demo we have quickly,
18:15
let’s go and take a look. We have quickly stood up a cloud-based server. We’ve stood up a EC2 instance. We’ve set up a custom domain with a certificate. And you can see here it’s made from Let’s Encrypt. We’ve installed Docker and we’ve installed Natan,
18:34
Redis, and Postgres. The value of Postgres is all of this is being run. You can go back and look at your execution. Anything that’s being stored in there is now stored in the database as well for the memory that’s being done with Natan. If you have any questions, if you want to ask more about this,
18:52
reach out. Whether it’s in the comments or chat or add something into our GitHub repo. Thanks.
Let's work together.
Partner with Augusto to streamline your digital operations, improve scalability, and enhance user experience. Whether you're facing infrastructure challenges or looking to elevate your digital strategy, our team is ready to help.
Schedule a Consult